
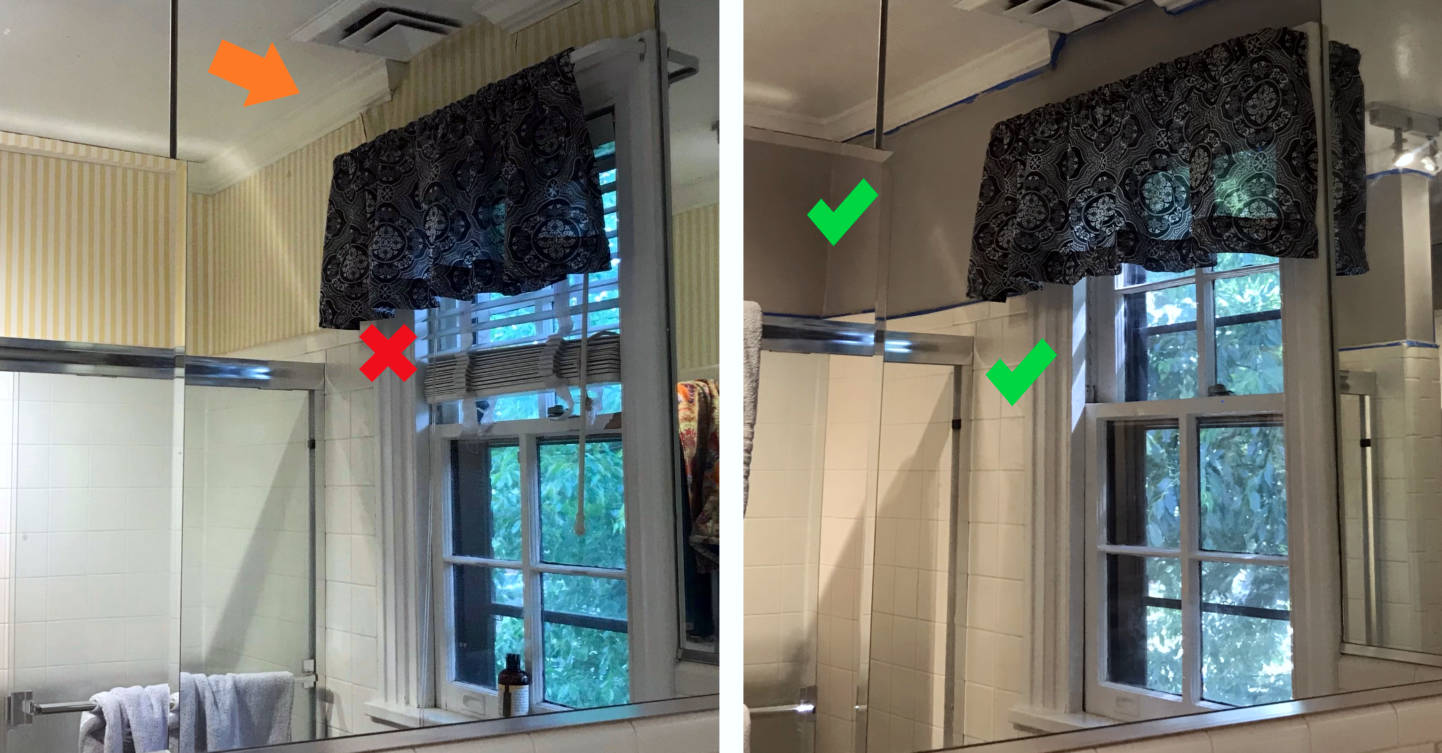
As usual, the yellow and white striped wallpaper stared back at me, irritatingly peeling away from the wall, when I walked into the bathroom. Our small 3/4 bathroom has only an old window for ventilation. But, the window doesn’t hold itself up anymore. Years ago, the cords that hold the window sash up snapped after closing them shut a little too hard, one too many times. I remember hearing the sound of the window weights slamming into the base of the window casement as the sash cord broke before knowing how it all worked.
Rather than discovering what truly lies underneath, we keep the damaged walls hidden behind the ugly yellow wallpaper and use whatever is lying around to prop open the window during showers.
But that’s the cheap solution. A random bottle, Bluetooth speaker—anything—to hold the window open. We started to dig into having a professional dismantle the window sash, replace the broken cord, and reattach the window weights. The price? About $150 per window (two cords each). We had three windows with broken cords. That’s $450! We’ll call this the expensive solution.
But what about the frugal solution? We preach the value of being frugal instead of cheap, so what’s the better option here?
Well, considering the cost of the replacement cord—the actual broken part—is only about $10 for dozens of feet, the frugal option is to make the repair yourself! Let’s get our DIY boots on and properly perform a sash cord replacement!
DIY Project: Window Weights and Sash Cord Replacement
Many owners of older homes will have to deal with a broken sash cord at some point. It’s a relatively simple repair if you have the right tools and supplies. You can replace a window sash cord in about two hours.
Until recently, we never knew why there was a cord in our window and what was supposed to be attached to it. All we knew was that the window would fall shut under its own weight. Replacing the actual sash cord and reattaching it is the easy part. Removing the pieces and parts to get to the window weight is intimidating.
I turned to my trusty teacher This Old House for some education on window sash cord replacement. After a five-minute tutorial on sash cord replacement, I was convinced I could do this repair, myself.
Our window setup was a little different. This is my process to reattach both window weights on a lower sash for a double-hung box sash window for about $16.
Motivated by the deteriorating wallpaper, we weren’t going to let fear of DIY mistakes slow us down any longer. We got off our butts and started on this simple project. By making necessary home repairs ourselves, we learned more about our home, acquired a few new skills, and saved money in the process.
1) Understand the parts of a box sash window
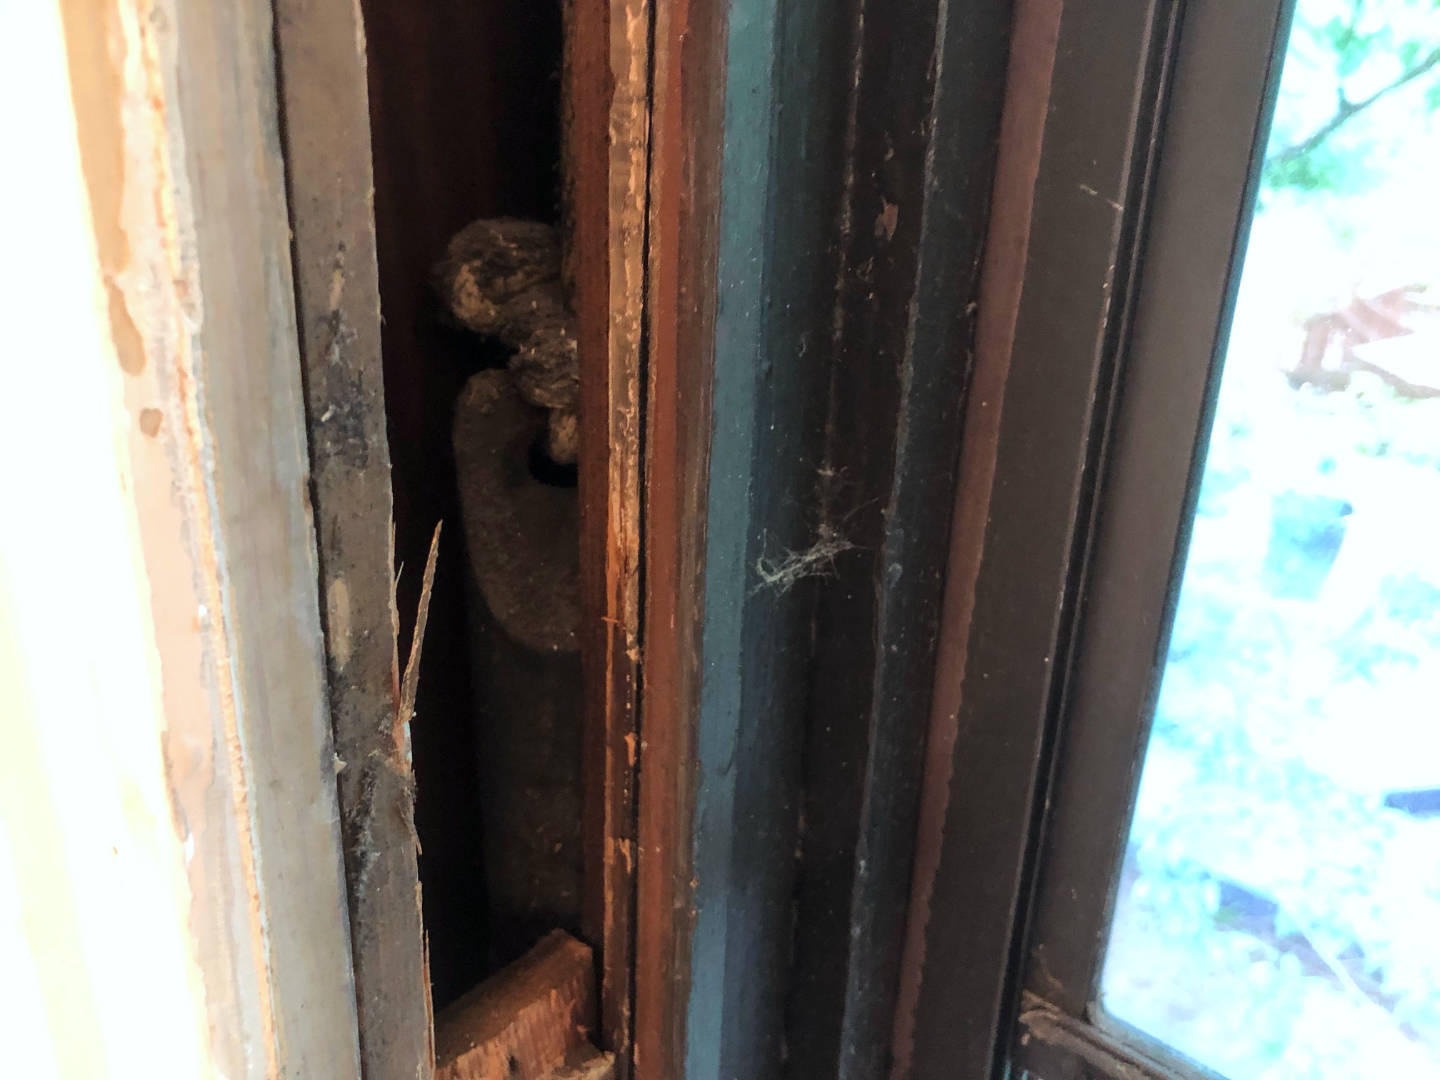
While Chris was busy in his office attempting to plan our next trip, I snuck off to carefully rip apart our bathroom window to find our window weights. As soon as I located the hidden door within the window frame, Chris popped in to check on me.
I slowly turned around and said, “Surprise! I got the window off.”
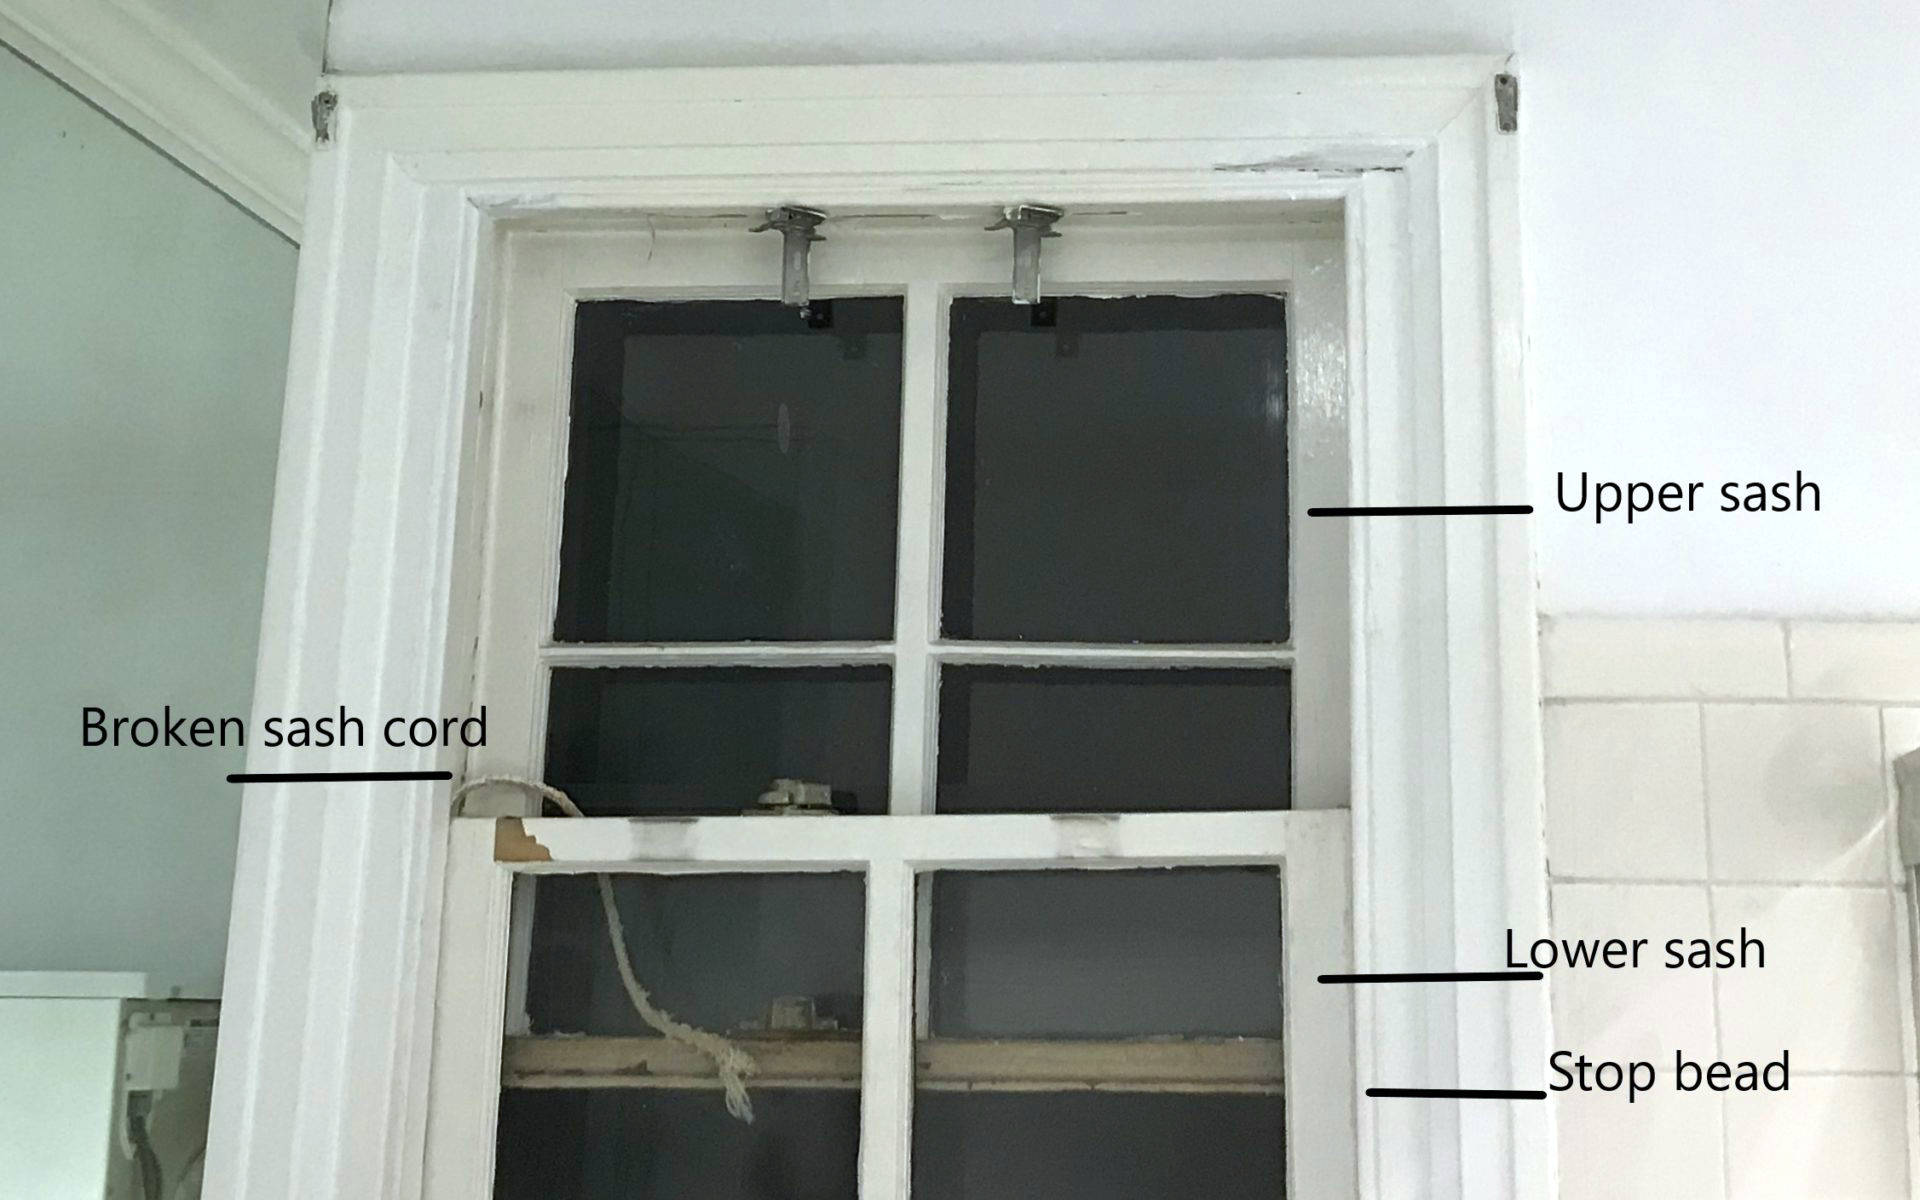
Single-hung vs double-hung
You should understand what type of window you have and its assembly. A box sash window is single-hung with one set of counterweights or double-hung with two sets of counterweights. Double-hung windows allow for both the top sash and the bottom sash to open.
Once we got inside our window box, we discovered it was actually double-hung. The top was sealed shut for unknown reasons. I wasn’t about to go down that rabbit hole of trying to unseal it.
Cords, weights, and pulleys
The sash cords run over a pulley that’s attached to window weights hidden inside the window box. These act as a counterbalance when the window sash is raised. When the cord breaks, there isn’t anything to hold the sash up and the window will fall shut.
2) Gather tools and supplies
Once you are familiar with the layout of your window, get all the tools you will need to get the window box disassembled and then reassembled. Allow two hours to complete this project, longer if painting is involved.
- Utility knife
- Molding pry bar or hammer
- Screwdriver
- Nails or screws
- Cotton sash cord – 1/4 in. $8 for 50ft
- Mask
- Tarp
- Silicone spray lubricant (optional) $5
- Paintable caulk (optional) $3
- Paint supplies: paint, brushes, tape (optional)
Prepare your area by laying a tarp down to catch debris, loose nails, or paint. When working in older homes, you should wear a mask when disturbing possible lead paint. This serves as double protection from breathing in lead paint but also any debris that has collected in the window in the past 100 years.
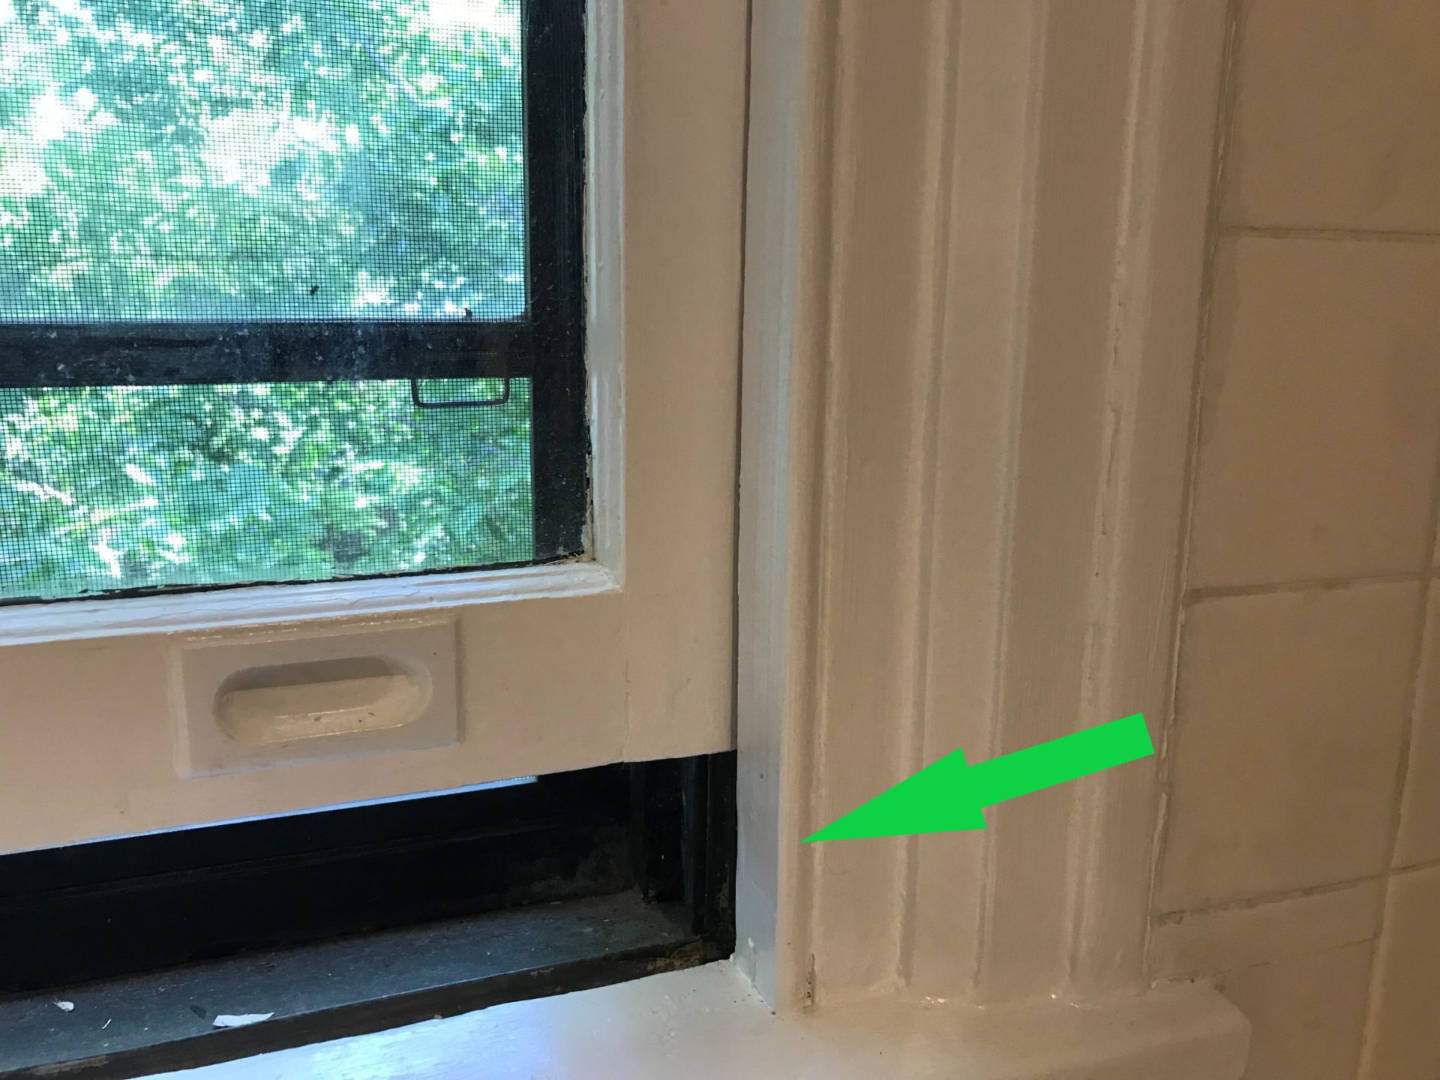
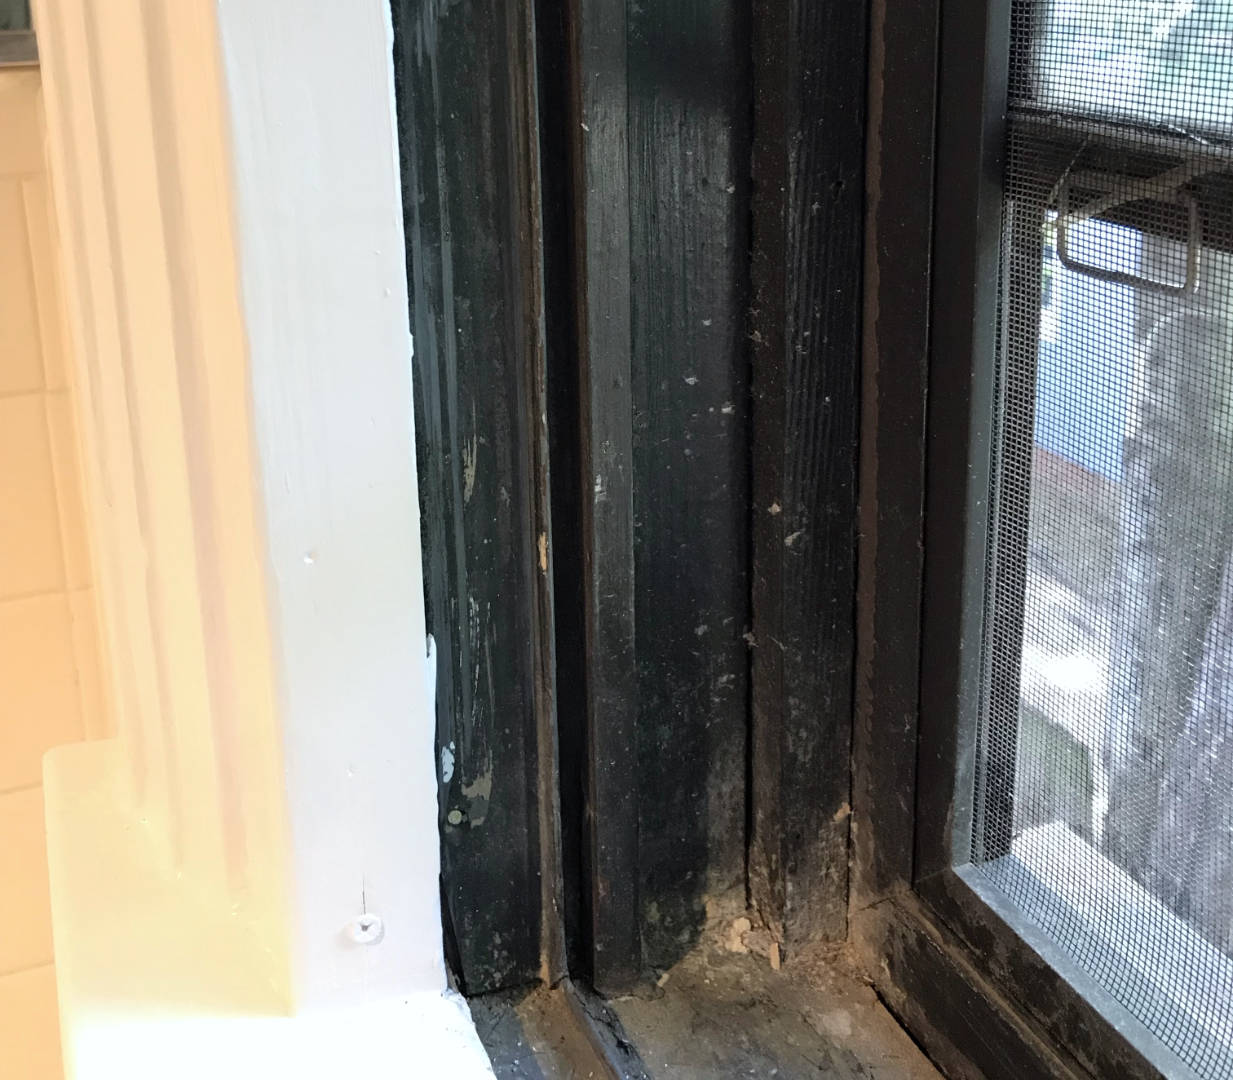
3) Remove stop beads
The first step to window sash cord replacement is to remove the stop beads. The stop beads are thin pieces of wood that border the inner window frame. They stop the sash from coming out of the window box.
It was difficult to see how our window was assembled because our window frame had so many layers of paint. Based on the diagrams I researched and the tutorial I watched, I assumed the innermost frame was actually the stop beads holding the window sash into the box. I took a guess and started to poke around. I wanted to see if there was any movement with a little prying. Sure enough, I was right and before I knew it the stop beads were off.
- Determine how the stop beads are secured.
Some stop beads are screwed into place and others nailed in. If you can see screw heads, you are in luck. Simply unscrew and pry the left and right stop bead away from the frame.
If you do not see screws, yours may be tacked in like mine were. My stop beads were also sealed to the frame with a thin bead of caulk and a lot of paint. - Slice the joint between the stop bead and window frame.
Use a sharp utility knife to cut the seam on both sides of the frame. Then carefully pry the stop bead away. Start in the middle allowing the stop bead to bow slightly, then work your way up and down until it is removable from the frame. Be careful not to snap this piece of wood. Set aside and repeat on the opposite side. - Remove all nails from the stop beads.
Nails may be rusty. Ideally, you should remove all nails from the stop beads and replace them with fresh ones. You can choose to switch to screws for easy future repairs.
Boom! You’ve freed up your window sash by removing the stop beads.
4) Remove window sash
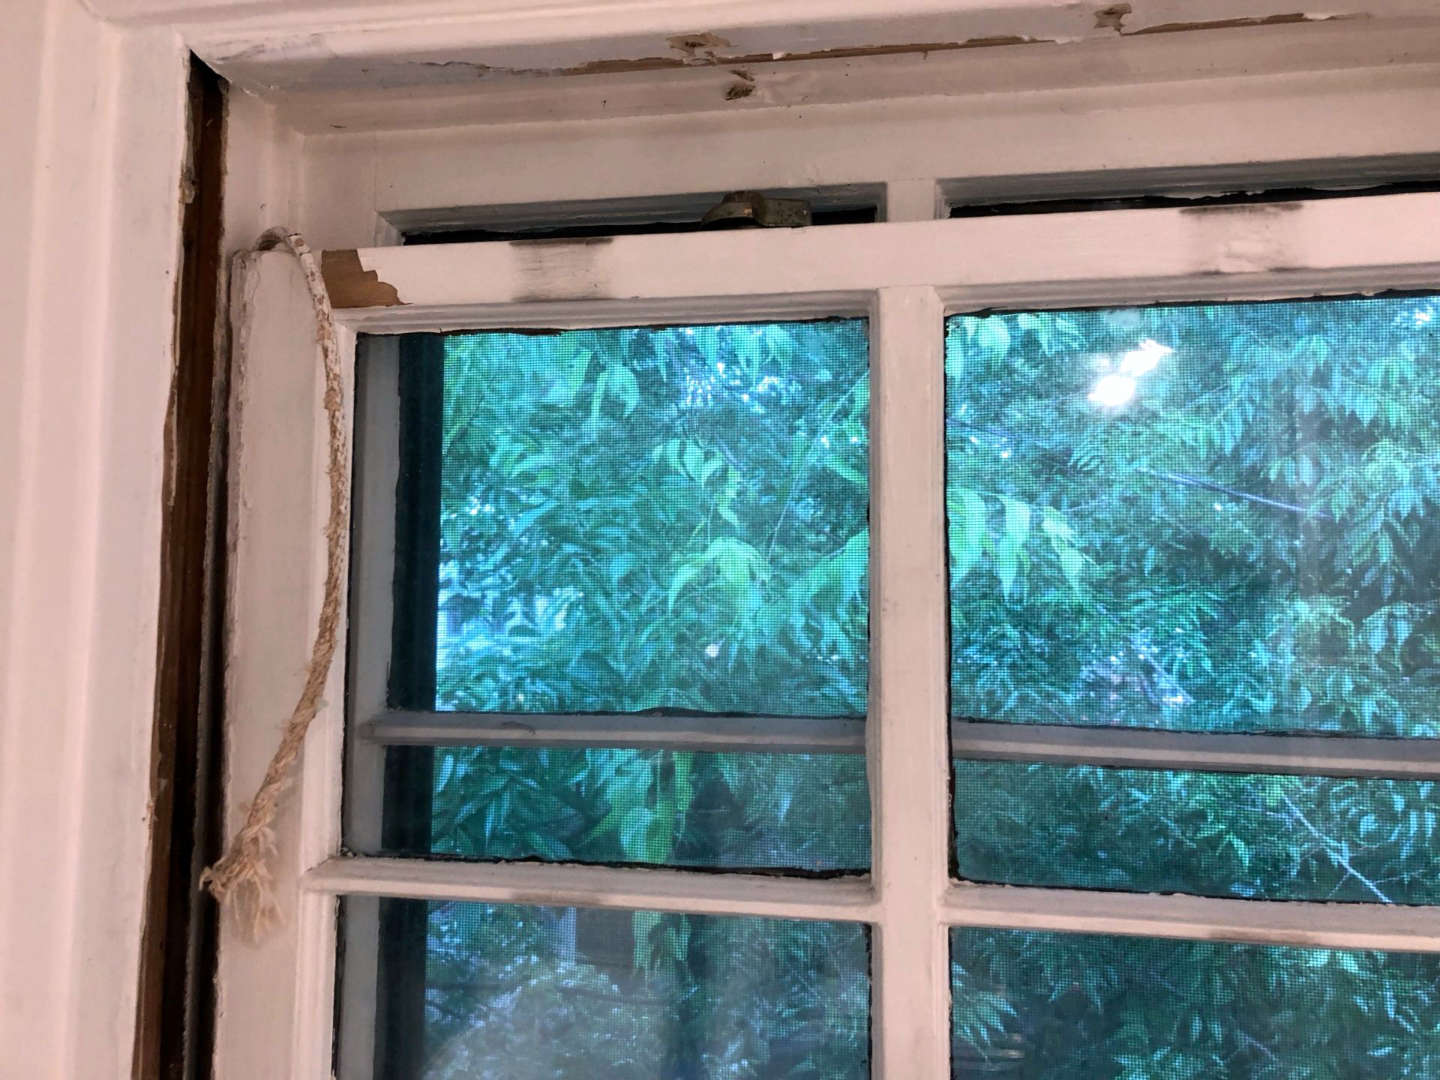
With the window sash free to swing out of the window box, you need to remove the remaining sash cord in order to fully remove the sash.
- Cut sash cords.
If the cords aren’t completely broken, cut the cord close to the top of the window sash but don’t let the cord go. Allow the counterbalance weight to pull the cord up along the pulley and let the weight come to rest gently inside the window box. I highly recommend replacing both sash cords to avoid repeating this process in a few years when the other cord inevitably breaks. - Lift the window sash up and out of the window box.
Thin metal rails also held in our window box. We needed to lift the sash up and off these rails before it was free. - Set aside window sash.
Place the window sash somewhere safe, unless you want to start your next DIY project immediately: replacing old window panes.
With your window sash free from the frame and stored securely, you finally have free access to the sash cord!
5) Replace sash cord
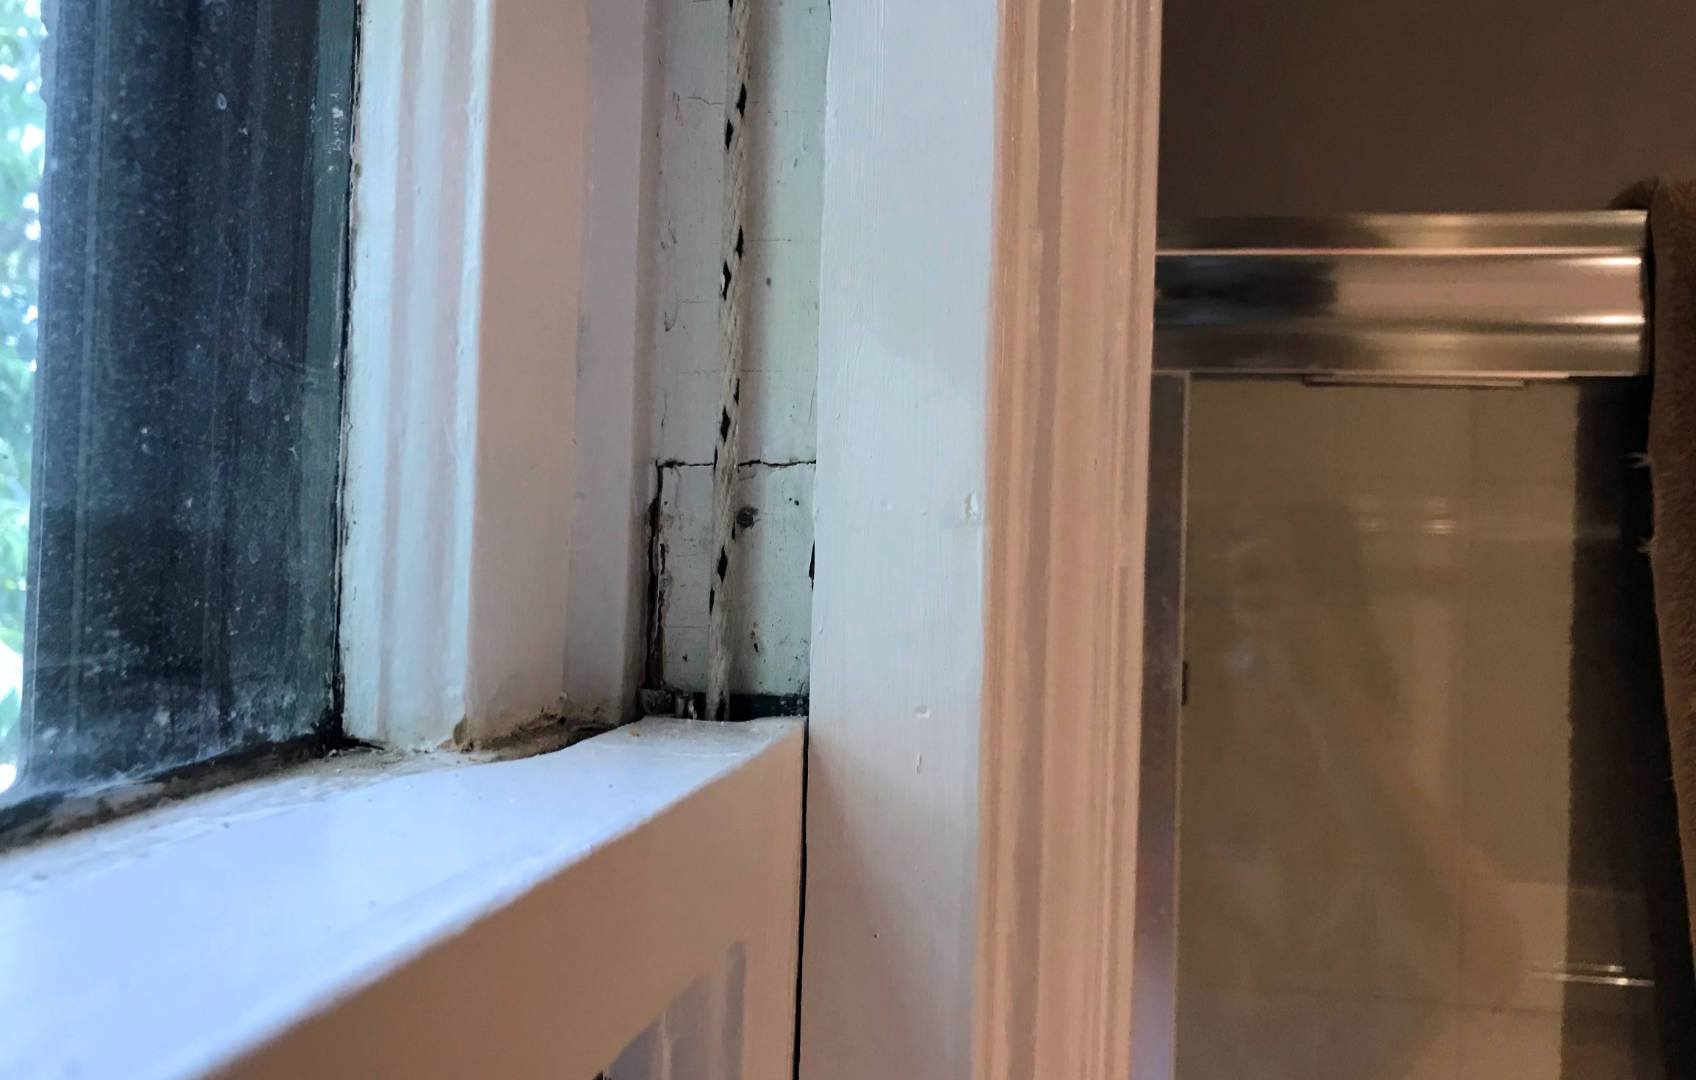
On either side of the window box, a small hidden pocket contains a long, thin counterweight. It is located behind access panels on either side of the window box.
- Remove the access panel.
You will need to remove the cutout access panel to locate the window weights. Unscrew the screws holding this piece of wood into place and lift off the access panels. If your window frame also has metal rails like ours, you will need to pry these off at the nails being careful not to bend them. The access panels will be just behind these rails. Your access panels may be nailed to the window box instead. It will require a little prying to gently remove without breaking the wood. - Remove window weights from hidden pockets.
Reach into the pocket and retrieve the window weight. It’s a long, thin heavy piece of metal. It may be original to the home, so you could be holding a piece of history! Remove old rope and set aside. - Replace sash cord.
Feed the new cord into the pulley and let it slide down the inside of the window box. If needed, attach a small weight to the end of the cord to draw it down the channel. Pull the cord through the hidden pocket and securely tie it to the window weight. Replace the weight inside the window box and let it rest at the bottom. Pull any slack off the cord and cut the cord about halfway down the frame. Tie a simple knot to avoid losing the cord end. Repeat on the other side.
Alright, all done! You’ve replaced the sash cords! Now, just walkaway…
Wait! You probably need to do some minor repairs…and put it back together! You’re almost done with this sash cord replacement though!
6) (Optional) Paint sashes and channels
If you wish to touch up or paint your window sashes or channels, now is the time to do it. Once the sash is back in the window box, you will not be able to access the backsides or the areas in which the sashes overlap. Plus, you do not want to risk painting your window shut.
Unfortunately, I forgot part of this step and now have a dingy white strip out of reach of my paintbrush.
7) Reassemble the window
Now, onto the fun part! Let’s put the window back together.
- Reattach the cords evenly on either side of the sash.
Set the sash in the window box in its lowered resting position. When the sash is down the weights need to be up. Pull the cord to bring the weight to the top of the window box then back off just an inch from the pulley. Make a knot in the rope lining it up with the hole on the side of the sash. Push the knot into the hole and secure the knot with a nail or screw through the cord and knot. Cut off any excess cord. Repeat on the opposite side. - Put sash back inside the window box.
Attach the new cord. Feed it through the groove on the sides and push the sash back into the window box. If your window has metal rails, reinstall these before you attach the cords. Then lift the sash up onto the rails and down into the window box. - Test out the window sash.
Raise and lower the sash to ensure it feels even and opens properly. Run some lubricant along the edges of the window sash and track if it’s sticking. Use regular candle wax for wood and silicone spray for vinyl. Test how it opens and closes. Adjust as necessary. - Replace the stop beads.
Position the stop beads exactly where they were before. This is what stops the window sash from coming out of the window but needs enough room to rise and fall. Angle in the stop bead at the top first. Work your way down by tapping it into place. It will be tight. Screw or nail it into place. Nails will be less visible but screws are easier to remove. Make pilot holes to avoid splitting the wood. Repeat on the opposite side and test the window again.
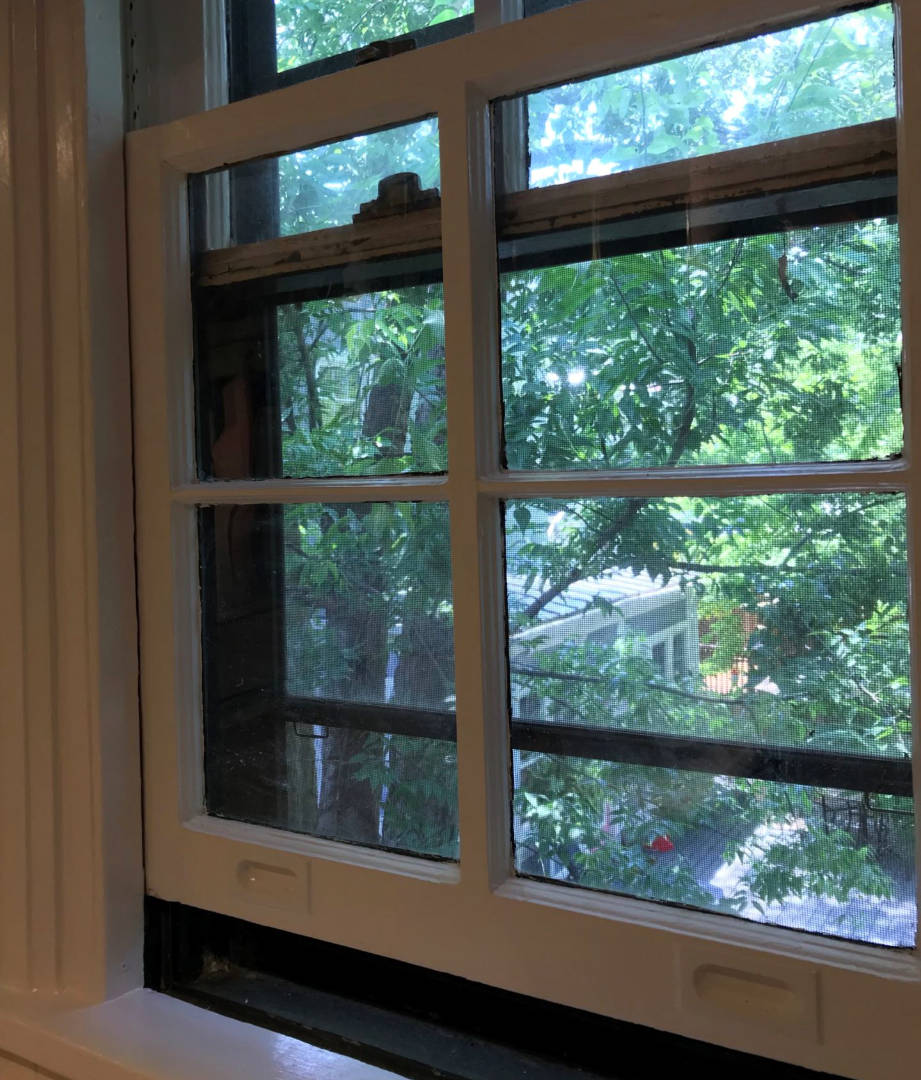
At this point, the window sash should function correctly! If it’s sticking, or moving in an awkward way, you may need to work backwards to find the hitch.
8) Caulk or paint window
It may be tempting to call it quits at this point, after all, the window should be functioning now! But, there are still important steps left that will prolong the life of your work and the window.
The stop beads should be flush against the edge of the window box but a thin gap may be visible. The window I was working on is in the bathroom. We needed to seal up any cracks that could hold moisture.
- Reseal any joints.
First, caulk the joints you cut when you removed the stop beads. Apply a thin bead of paintable caulk for windows along the joint. Smooth out and remove excess with a damp finger. Quickly clean up any drips or caulk spills with a damp rag. Allow for drying time per instructions. - Prep for paint.
If you plan to repaint the whole window, this is a great time to start taping off your window panes. Be precise when taping off the panes to have them neatly painted. - Paint window box and frame.
Freshen up your newly repaired window with your favorite paint color. Even if the window sash is in good condition, most likely the window sill is a mess from all the random things you have shoved in there to prop open the window over the years. It’s a good idea to move the window sash up and down to avoid sealing the window shut while the paint dries. - Lubricate pulleys to stop squeaking.
Any squealing at the pulleys can be remedied with silicone lubricant spray. Aim the spray into the pulley the raise and lower the sash to evenly distribute.
Lastly, step back and relish in your accomplishment. You now have a functional weighted sash window that stays open on its own for $16.
DIY Sash Cord Replacement For $16
We’ve put off this daunting project for over a year. After transitioning to part-time work last year, I could no longer blame not having enough time. Being financially independent gave us the freedom to work less and spend our time how we wish.
My wish was to get this done before summer started. Once we decided on the paint color and I started peeling away at the wallpaper, there was no turning back.
By doing the window repair ourselves, we saved about $434 across three windows given the $16 supplies are enough for all our windows. While saving money isn’t the only reason to do something yourself, it might be the driving factor.
This DIY project taught me more about our 1928 home and I got a glimpse at our 93-year-old weighted windows.
Our mini bathroom renovation is only partially complete. After some minor grout repair, a fresh bead of caulk, and an exhaust fan installation, it’ll be complete.
Until then, the other window weights released from their sash cords are calling my name. I’m feeling extra confident in my abilities and I’m hoping to find a new little surprise waiting behind each hidden door.
I’ve written up a little FAQ below for those of you out there searching for weighted windows and sash cord replacement questions based on my research for this project. I hope it helps!
Weighted Windows & Sash Cord Replacement FAQ
Prices will vary depending on your local area’s labor rates. Professionals in our area quoted between $80-120 for one window sash cord replacement depending on window casement materials, design, age, etc. You should replace both cords with the window sash disassembled, we received quotes of $150 per window.
A simple overhand knot will suffice, though a more secure knot will work. What’s most important is that you secure the knot well against the window sash with a nail or screw. Be sure you drive it through the loop. For the sash cord end on the weight, I used a climbing knot or figure-eight knot.
You’ll find plenty of nylon and synthetic cord choices in your local big box store. However, these can stretch overtime especially as they’re exposed to weather changes. Use standard cotton braided sash cord wherever possible. The standard size is #8 (1/4 inch) thick.
If you’re disassembling an old window, you might find a loose weight sitting in the casement! Your window probably still uses a counterbalance weight so that it’ll rest in a variety of open positions. At some point, that weight may have come loose from the window sash when the sash cord broke in the past. The right way to fix this is what this post explains, but in some cases it can be easier to sneak a new weight in along with new sash cord without disassembling the sash and stop bead!
Home improvement projects are all the rage this year! What sort of repairs, maintenance, or DIY projects are you getting into? What’s your motivation? Let us know in the comments!
8 replies on “How Closing a Window Almost Cost Us $450 (Sash Cord Replacement)”
Even if it’s a DIY project that saves like $5, I feel incredibly proud if I took on the work myself instead of hiring someone else to do it.
Great DIY project, guys!
It is a rewarding feeling to DIY. It’s always a learning experience no matter how small. But when you do it yourself, you are more invested and appreciate the end result that much more. In fact we made the decision to install that fan so the paint won’t peel again. It’s was a nightmare and took over a week but we got it done with just a little help on the roof.
A couple of tips…
Use cotton cord only…
An extendable magnet and a small steel screw will make fishing the cord through the pocket easier…
Sometimes the best solution is to remove the two screws from the pulley and threading the cord through first and then through the pocket first…
Tie the over hand knot moving in close to the end of the cord…
BUT FIRST dip the end into a water bottle wetting a couple of inches…
This allows you to get the knot very tight and then trim it off closely with a single edge razor blade…
One more thing…
Push the small securing nail through the rope BEFORE trying to drive it…
You will figure out why….
Thanks for these extra tips. I’m about to embark on window number two soon so these tips will come in handy.
We have a Queen Anne house built in 1858..Thank you for your detailed information regarding the window weight repair. I was thinking of asking on my FB Community Page if anyone knew of someone who did this,but .I like to figure out how much time it takes for a job and pay by the hour.if possible..How long did it take you for each window..give or take 30 minutes?
Hi Barrie,
It took me way longer than it should have just because I was discovering what I needed to do by slowly dismantling the frame. However, a novice could do a window sash repair in less than 2 hours if you have the instructions and all the tools and supplies ready. I’d say a professional, 1 hour. Most of the time, the removal of the stop bead requires you to cut through the caulk. This gap will need to be recaulked and then allowed to dry before touching up or repainting the whole thing.
My windows were white so white caulk was the best choice. You may be able to get away with clear depending on the gap or none at all if it’s a really tight fit. The caulk will help with insulation though.
If you do want to paint the windows, it is better to do this while they are off so you can get to both sides. And don’t forget to paint the inside frame while the sash is removed.
Thanks for coming by. I haven’t worked on the other three windows that need to be repaired yet. You’re giving me the motivation to try my handy work again!
I cannot get the cord through the sash opening. i tied a screw to the end but no luck. I tried reaching up the hole where the weight was located but it is too small for my hand to get into. I also tried putting a straight curtain rod up to see why it will not come through. Any ideas for me to get the rope through?
Angie,
I believe you are on #3 in step 5. It sounds like the sash cord is getting caught up in the track of the upper rails. There could be debris that has fallen in there. The only suggestion I have would be to try to feed a thinner string down the track with a small bolt or nut attached to the end. If you successfully get this through, then you could tie the end of that that cord to the real sash cord and pull it down the track. Once it’s through, attach it to the weight. If you haven’t pull the cord out of the other side, try this same tactic with the existing sash cord before cutting it off.
I think the only other option is removing the side panel on the upper sash to see what is causing the block. I hope this helps.